28 March 2013

-SHOWCASE- Imperial Guard Commissar


Hello!!!

Finally, the Commissar of the 157th regiment is complete!
In this picture you can also see the details of the equipment behind the model.


I'm currently working on Hellhound ... It 's almost over! soon i
I will post photos of the finished work!

As always ....Thanks for reading!


-WIP- Imperial Guard Commissar Pt 2

Hello!
It's time to paint our commissar!


I first primed with an airbrush using the Vallejo Black Primer.


Then i coated the model with Lifecolor Panzer Gray and Vallejo Hull Red on the base.


After which i applied the base colors.
Since he is an officer i painted the sash with ultramarine blue and epaulettes with Vallejo Liquid Gold


.. and I washed the entire model with black oil paint thinned with (a lot of) white spirit


...Then i added a few details and i did all the highlights


On next post you wil see the finished commissar!
Thanks for readings

27 March 2013

-WIP- Imperial Guard Commissar Pt 1


Hello everyone!
I'm still working on my Imperial guard, and since I'm not a very experienced player, I was advised to use a commissar in the infantry platoon.

I immediately set to work!

This is a very simple conversion, but once painted in my opinion is very nice along with the rest of the army.

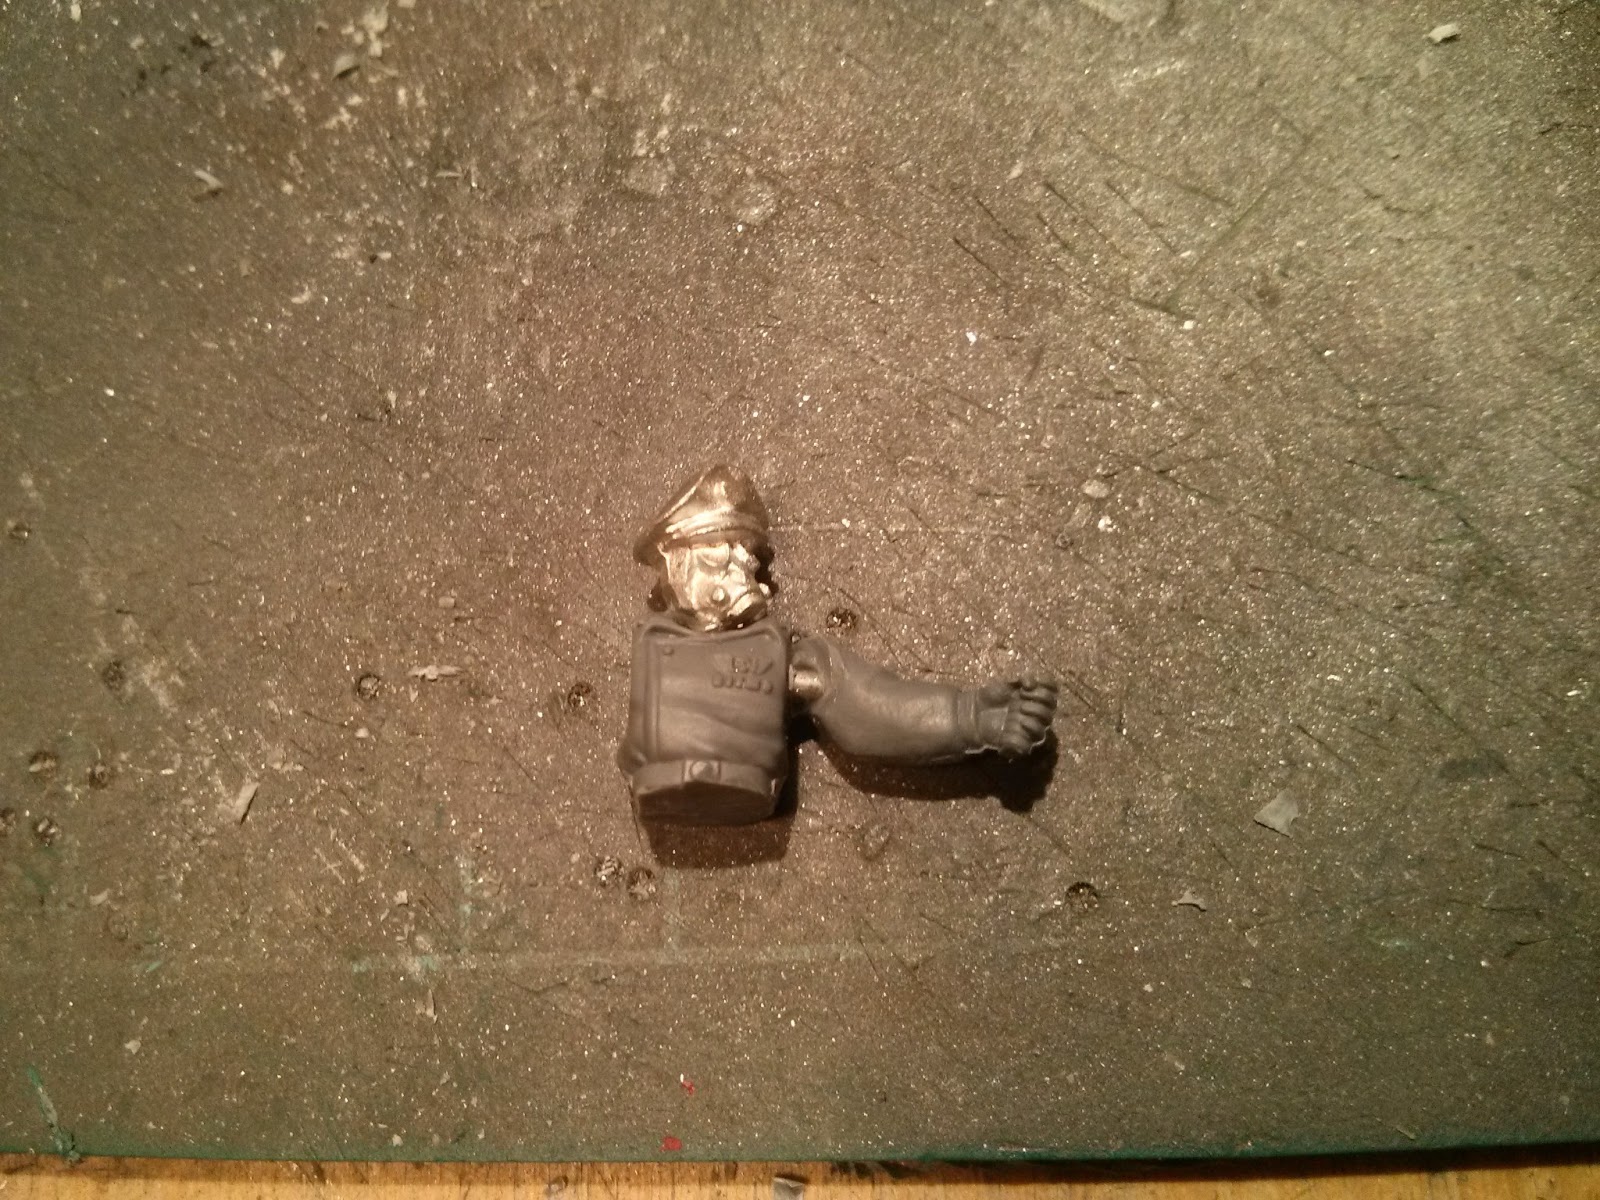
I chose the torso of the Tank Commander.

I separated from the rest with a hacksaw and i sandpapered to make it fit with legs.


I used the metal head of PIG IRON PRODUCTION, which I think was perfect for this model.


The right arm was derived using the arm from heavy weapons sprue (mortar servant)
The left arm is that who originally carries the sergeant chainsword, and the bolt pistol is from space marines scouts sprue...


I pinned and glued all components.


Now it's green stuff time :D

I sculpted the shoulder pads like those of real military officers
I also sculpted the band like such as that used the officers when I was a conscript


(ps: I have been in the army in the true 157 ° Infantry Regiment in the far 2000! haha)

This is the result...


Thanks for reading!
Now it's time for Pt 2... PAINTING!

05 March 2013

-WIP- Leman Russ Punisher pt1

Hi all!


Everytime i speak about the Leman Russ Punisher, my friends tell me that's too expensive, that it has no AP, that is only BS 3 etc etc... BUT I LOVE HIM!

So i decided to make a conversion ahahah

I started by cutting the barrels from an assault cannon from Dreadnought plastic kit...


...then i used a land raider bit as enclosure


I filled all gaps with green stuff to make him more resilient, then i sealed with plasticard.


After the green stuff has dried, i drilled all barrels and i've added some details with a plasticard stick, i've sandpapered all imperfections and i added a periscope...


Heavy 20 GO GO GOOOO !!!!!


 ...Painting is already started :)

Thanks for reading!


01 March 2013

-WIP- Imperial Guard Kasrkin squad pt2 (Scheme Test)

Hi all!

I've tested my colour scheme on Kasrkin Sergeant, i know that usually we must use an old miniature to make tests but i felt confident on result ahahaha

At first i started with base colours...

I've airbrushed the whole model with  Lifecolor Panzer Grey (RAL 7021) and i've added some details with Mephiston Red, Nurgling Green and Boltgun Metal


Then i washed with blak oil paint...


After the oil paint has dried (it takes about 2 hours) i've added more details and highlights


Then i made the final highlights and i painted the powersword with airbrush... 
When i bought this miniature was in these condition


...And this is the result after plastic surgery ahaha


PS: The green slime on the base was made with Vallejo Still Water + Vallejo Transparent green


I'll post photos of the completed squad soon!

Thanks for reading!


Related Posts Plugin for WordPress, Blogger...